
I'm going to place the water outlets further back as well. I'll ha e the water enter from the front of the front of the esc. The bends are just easier. This routing will also work fine if I were to use water cooling motors.
It doesn't matter how many boats you've built, drilling holes never gets easier...
-
I'm actually not worried about heat at all, but I will keep that in mind.
I plugged in the spark suppressor and nothing blew up. It uses a 50ohm 10W resistor (AA for size comparison). It's major overkill, but it's the best option that I have on hand. I tucked it under the battery tray with double sided tape. It uses the balance connector on the battery to charge. I have a plug between the cap bank and the spark suppressor. I also made a little cover to the balance plug. Of course everything is sleeved silicone wires.Leave a comment:
-
If the motors are too hot contact Herve from Mini-Meca he can make a nice water cooled motor mount using your support mounts https://www.mini-meca-rc.com/74-supports-moteursLeave a comment:
-
:D They are nylon SLS printed (powder) from shapeways.Originally posted by fweasel View Post
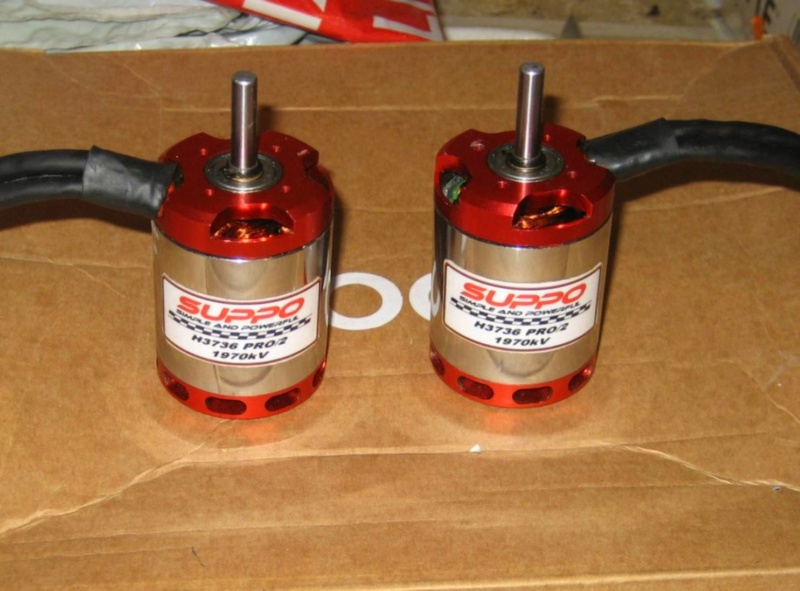
The smaller version of those is exactly what I have. I went with the 3730 because of the 1580kv. There isn't much sense in the slight jump to the 3736, even if they came in the right kv. The largest is the 3740. The issue again is kv. They are either 1180kv or 1760kv. My prop size maxes out at 50mm which shouldn't be an issue for the 1760kv, but that's a lot of rpm on 6s. Going 1180kv would require new speed controllers as well as I would then need to run 8s.Originally posted by Alfa Spirit View Post
I change how I'll wire the shared capacitor bank. I wish I had 14awg, but the 16awg shouldn't be a problem. It's only there to even out the voltage between both sides. You could say, but what about ripple?" Each ESC has two smaller caps and two much larger caps. The bank uses seven 1000uf caps. I also decided to ditch the 90 degree connector and solder the wire straight.
Since we're talking about wiring... I got the OSE 8mm bullet connectors, the ones that look like giant XT60/90. They are just way too overkill to justify the force it takes to work with them. To get around losing the anti-spark, I can just hook an extra connector tot he balance lead of one of the batteries to the capacitor bank. If anything, it's still easier than having an extra wire on the battery and ESC.
I didn't realize how massive the larger water outlet was. It's a good thing I made sure to order larger hose.
EDIT: Forgot to add the motor chart...Last edited by boredom.is.me; 11-13-2021, 08:25 PM.Leave a comment:
-
Mitoot-SUPPO outrunner motors are awesome, incredible quality/price ratio, good choice the magnets are very strong.

 Last edited by Alfa Spirit; 11-13-2021, 01:14 PM.
Leave a comment:
-
Why replace the aluminum parts with plastic? Well, I lost the two aluminum bits around the shaft entrance. It would also be a pain to remake them if they ever stripped, which isn't unlikely.
I forgot to design the signal wire passage way on the ESC mount, so I had to cut those out. No biggie.
The ESC mounts are in. I'm going to leave them to set up a bit more today, then will go back with a little more adhesive just for a little extra strength.
I did move the ESC's forward a little to account for the fact that I may want to go with 4082 motors in the future. Each if these outrunners is 310 vs the 450 per 4082Leave a comment:
-
The white outline is nice. I wouldn't apply that to this build, but definitely something to consider for the next. That should be something on the darker side, maybe a very dark grey and either bright blue or yellow.
Your double white strip is pretty much what I'm thinking about doing with the fluorescent yellow: the offset, tear drop wrap around, except a single stripe.
I do agree with the windshield wrap too. I feel like this boat is just difficult to take pictures of. It's wrapped pretty far back, and the taper is a lot shallower than it looks.Leave a comment:
-
You could pinstripe the windshield frame with the thin 3mm tape, mask off the rest of the canopy, and spray the windshield on with gloss black paint. Pull the tape and you'll be left with a white window frame. Personally, I think the canopies look sleeker when the window wraps further down the sides and tapers off.
I did this one free hand with pinstripe tape on my Mini Zonda
2018-08-15 00.15.22.jpgLeave a comment:
-
After the windshield vinyl fight, I decided to order "carbon fiber" and florescent yellow pin striping in 3mm and 5mm widths (they came in pairs). The plan is a black windshield (paint) with a carbon frame. It would then get a clear coat. Here is a rough idea done with electrical tape. The yellow would just be for a little trim, but I wouldn't clear coat over it.
I'm wondering if I should do black or something lighter for the windshield color. I was looking at color changing vinyl at first, but didn't want to get into knifeless tapes or cutting.
I mocked up new esc covers. My cnc is down due to having to move, but that's not holding anything up. They will just be printed for now.Leave a comment:
-
Thanks. Yes a local body shop took care of it. It's all automotive grade paint.
I forgot the interior update. I chiseled out the mini threaded standoffs. They really didn't bond too well to the hull. It's a combination of not a lot of surface area, not the ideal surface (aluminum), and less than ideal glue. They really weren't strong enough for the job. This did leave spots where the sheen was ripped off of the layup. The new mounts are a bit different as they cover the entire perimeter of the esc trays. I'll be trying out "Zap Adhesives Zap-A-Dap-A-Goo" from OSE. The OSE description makes it sound good for the job so we'll see.
The lights are also coming from China, so that's going to be a Christmas upgrade.Leave a comment:
-
Not much major stuff for for today, but a bit of minor stuff.
The first thing was figuring out where to place the water outlets. I used little round stickers to show to options. The first is between the rear "N" in the name. Because of the very geometric oriented design of the font, the first N on the right side matches the location of the second N on the left side. Ultimately, I think I'll just put it behind the name.entirely.
I do not like chrome. I was able to find 6v waterproof lights premade as a complete unit to replace the ones I made. They do have tinted lenses, but the bezels are all black. And since they are 6v, I can run them straight through the on/off remote switch with the step down or resistor on the red. To add to the black lights, I ordered black water outlets as well. The antenna isn't chrome, so that can stay.
Speaking of antenna, I finally put that on.
I realized that I was using smaller 3mm id tubing so I ordered 4mm. I also ordered proper sized silicone o-rings for all of the external fittings. I have to replace the hardware for the stingers as I guess I used them somewhere else. It's a good chance to get the final pretty hardware.
I need to repin the front of the canopy. I technically never finished it up properly, but it was easier to remove them than it was to deal with the built up paint.
Aside from that, it was really just a bunch of edge work as a result of the paint building up.Leave a comment:
-
Got her home. The clear went on this morning, so I'll give it a day or so before I really mess with it.Leave a comment:
-
Good news and bad news. You can see the good news. The bad news is that the carbon decal for the windshield just couldn't conform to the compound curve. I don't want to paint the windshield on, so I'll design something else with smaller sections. I really want to keep that carbon look. Whenever that happens, I'll just come back and get another coat of clear thrown on it. Oh ya, all of the decals are under the clear coat.
I was really torn on where to put the HPR 010 decal. I didn't want it to be a symmetrical design, more of a signature, which is why I placed it along the teardrop rear edge. There is a slight extension beyond the teardrop, but I still have to place the antenna which should continue the teardrop to a "point".
I can't wait. I gave the painter a multicolor swatch and said, "give me something between these two. Make sure there is no warm tone to it. I want it cool." He nailed it! (My phone shows colors a little warmer than they are.)Leave a comment:


Leave a comment: