
Originally posted by Darin Jordan
View Post
-
I know lol. I saw those and its cheap.....but I had to order...wait and then do something with the orange color that didn't match. Plus mine has more capacity lol. -
Its still a lot nicer. Plus the satisfaction of doing it yourself. Sure beats sitting in front of the tv waiting for the mailman to come!
Keep the boat refit rolling!Leave a comment:
-
Good Work on the water cooling plate...
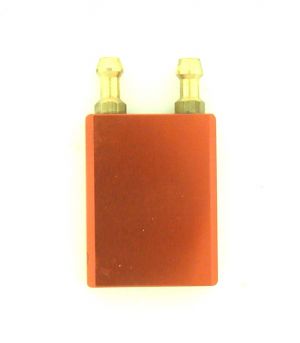
It looks like more work than it's worth, however... For those without a mill, I used one of these to convert my Mamba Max Pro ESCs to water cooling. For the price, I just couldn't justify firing up my own mill.... They are only $5.95... plus shipping, of course...
http://www.offshoreelectrics.com/pro...prod=ose-80674
Leave a comment:
-
Thanks man. I didn't just make this, I did it a couple weeks ago,but its going in the geico. Its a mamba monster 2 esc that I converted to water cooling. I milled this plate out myself (isn't perfectly symmetrical but it'll work lol) because I didn't like what they offered for a cooling plate.Originally posted by Fella1340 View Post
20130922_215429.jpg
20130922_215609.jpg
20130922_215646.jpg
This was my first attempt at milling it out. Forgot to leave material where the screw holes go. Ehh
20130922_184354.jpgLeave a comment:
-
I am enjoying watching this come together. Keep up the good work!Leave a comment:
-
Motor mount almost done. Its very very strong. Two layers of probably .050 carbon plate sandwiched together, epoxied and dry overnight. Then I made the sides. Im waiting on some sheets im making to finish curing and ill cut the back part out,epoxy it on then mount it in the hull. I used the stock mount t is why I made this ramp. I felt like motor changes and servicing it was much easier.
20131030_231459.jpg
20131030_231504.jpgLeave a comment:
-
just curious on the CF plates (trays ect...) i know on my rc buggies and cars that on the edges weather be the chassis or shock towers ect...that (we) use CA glue to keep the edges from splintering or fraying on impact, being boats do not tend to incur this type of abuse still i thought i would mention this.
is it something you would do or just ignore in a boat?Leave a comment:
-
Wait till you see what in doing to hold my cooling hose in place. If it works out....its gonna be neat. Hint....made out of cf.....go figure. LolLeave a comment:
-
Originally posted by Fella1340 View Post
I marked it on the back side. Sanded them to the same exact size on a belt sander. Taped them together with masking tape. Plunge cut both at the same time. It produced a semi clean cut. Didn't splinter the carbon at all. Then I went back over it with a hobby knife and cleaned the holes up. Then finished the edges with 400 grit. I used one size mill bit.Leave a comment:
-
I love how.the battery trays worked out. Nice job. I am curious as to now the machining went. Were
you able to plunge and cut and the finished size and still get those nice clean lines or did you start with a smaller diameter cutter and then mill the finished size. I will be doing similar work over the winter
And would very much like to know how out did it. Thanks, JeffLeave a comment:
-
Yea I did that too. Lol. It would flip over, over 55 or so mph. After 3 flips, everything inside started coming loose.....the battery trays completely came loose. This is the flip that did it in:Originally posted by Darin Jordan View Post
Leave a comment:
-
That doesn't surprise me at all...Originally posted by kfxguy View Post
I usually try to run my Pro Boat stuff pretty close to the factory config to find out what it can do "out of the box", but I'm starting to do more testing and research with "variations"...Leave a comment:
-
Thanks Darin!Originally posted by Darin Jordan View Post
I did lower the trays a Tad. The trays sit on the humps toward the outside of the sponsons. It will help with getting the batteries in and out easier. Funny thing is when I removed all the wood stuff, the hull sits flat on a glass table now. Before it would teeter.Leave a comment:
-
Nice work.
For what it's worth, I... and Pro Boat, can't stand the wood in the interior either... It makes the boat look kind of cheap.
Maybe that will change on future offerings. I actually think, with a little redesign of the sponson area, that the battery trays may not even be necessary. Would love to see the cells right on the floors of the sponson canoes.Leave a comment:


Leave a comment: